 Monday, July 26, 1999
Slab Preparation
Monday, July 26, 1999These photos were taken today. Click on any photo to see a larger version of the picture (most of them are around 50k in size). (Sorry about the quality -- digital camera.)
This first shot is taken from the knoll to the east of the building site. It shows the entire "floor" of the house. At the top left you can see the river, which runs roughly parallel to the south wall of the house. Top right is the knoll on the west of the site. It has a fine stand of Ponderosa pines, mixed with foothill pines and scrub oaks, and provides excellent afternoon shade. 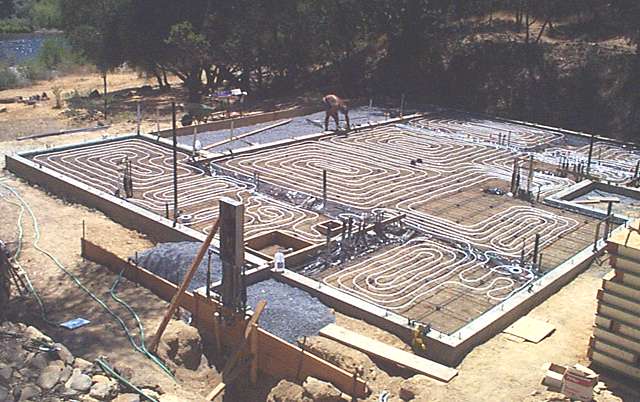 (You can see a photo of that western knoll, along with some others taken near the site, at my Notes from the Ledge home page.) I'll add something that shows the floor plan later.
The second photo, below, shows the bedroom and office on the western side of the house. It was taken from the north side of the house, looking south toward the river. (That's T.B. that you see in this photo and near the top of the foundation in the first photo.)
We poured the stem walls (perimeter of the foundation) a few weeks ago, and have been installing everything that has to go into the slab. We're scheduled to pour the slab on Wednesday (7/28).
Typically there are three places to run all the wires, plumbing, conduit, heating ducts, etc., that go into a house. 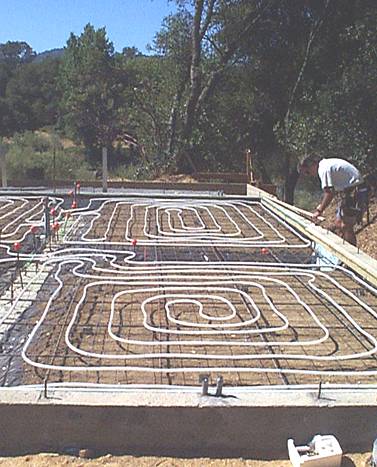 You can put them under the floor, in the walls, or in the attic space between roof and ceiling. But this house requires a little more planning than most. It is on a slab foundation and the walls and roof are formed from "structural panels" (see below). There are chases in the walls through which one can run electrical wires, but going around corners is tricky. Running anything through the roof is not advised, partly because it is awkward and partly because it compromises the excellent insulation qualities that are the primary reason for using the panels in the first place.
So almost everything goes into the slab. And obviously I don't want to be digging up this chunk of concrete in the future so that I can add some wires here or a pipe there, so a lot of thinking has gone into the planning of the slab! Luckily, T.B. is has many years of experience and an excellent brain, so I feel that the planning has been done well.
 For cooler, shadier winter days, we have radiant heating tubes (also known as hydronic heating) in the floor. This is the white tubing that you see in these first two photos. There have been many horror stories of tubing that failed, causing leaks and non-operable heating systems. The only way to fix these systems was to rip up the slab.
Most of these homes were built in the 60's (or thereabouts), and fortunately technology has solved most of the problems. However, it's still an area where we didn't want to take chances. Besides choosing a reputable hydronic heating installer and the quality tubing, we needed to ensure that the slab would remain stable. So T.B. increased the thickness of the slab by one inch over the engineer's recommendations. We've also installed both rebar and a steel mesh (normally a slab that is not load-bearing would have only the steel mesh). The footings are also extra-stout.
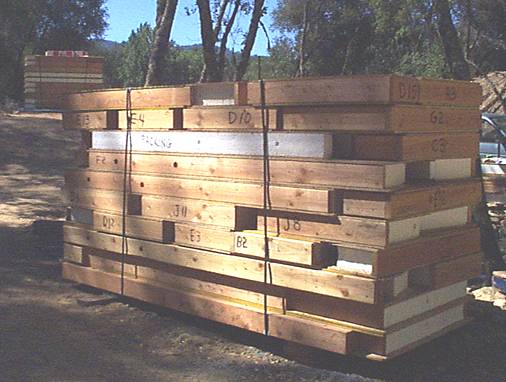
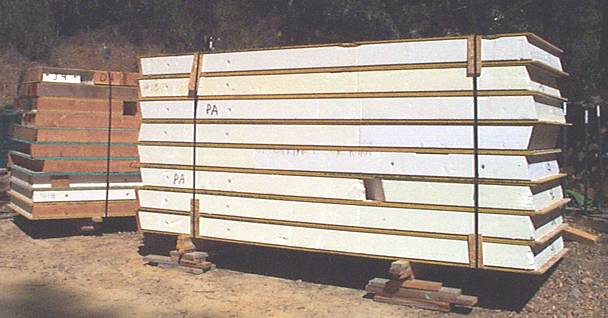
Here are photos of the wall panels (left) and the roof panels (below). The wall panels have 6" of styrofoam, sandwiched between sheets of oriented stranded board (OSB). The roof panels are identical except that the styrofoam is 8" thick. The R-value (insulating efficiency) is very high.
 We purchased the panels from Better Building Systems. They worked from David's drawings to produce a "build by numbers" kit for my house. Each of the walls has a letter ("A" ...) and each panel in the wall is numbered ( A1, A2, A3, ...). All we have to do is follow the plans and put them together. Hey, this is simple, who needs a contractor? Just kidding, T.B. Seriously, it is complicated by silly details like windows, doors, electric wiring, interior walls, etc., but still simplifies and shortens the framing process considerably. We will start setting the wall panels in place next week, and expect to be finished with walls and roof within a couple of weeks. We'll let you know if it's as simple as it sounds!
-- Donna