 Tuesday, August 24, 1999
Roof Panels
Tuesday, August 24, 1999My apologies for not updating this sooner -- but T.B. has kept me busy! And I've had some web page work to do as well, not to mention trips to the Bay Area and Salt Lake City. (Excuses, excuses!)
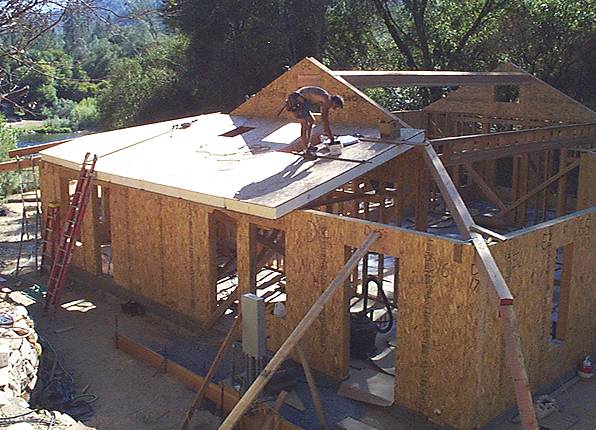
 The house now has a roof! Or at least part of a roof, anyway. It's changing the feel of the project dramatically. T.B. and Don spent most of last week finishing infrastructure, installing hip rafters, and straightening walls, and then put up the first roof panel last Friday, August 20.
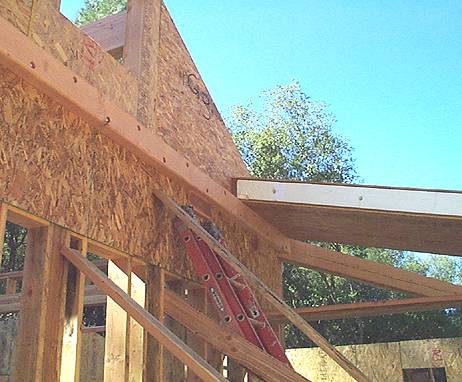
The roof panels are supported on the outer end by the walls, and on the inner end by a ledger board attached to the gable walls. At the corners, the hip rafters run on a diagonal to support the roof. The hip rafters and ledger boards will all be visible elements of the inside of the home, so we are trying to figure out how to finish them. T.B. has suggested several options. I'm leaning toward the simplest, which is just to round the corners, sand them smooth, and clear coat. With the concrete floors, every little bit of wood trim in the home is welcome.
 Inside, I'm now able to see how the hip roof will feel. The outer walls of the "hip rooms" will be 8' tall, and the inner walls will go to 10'8". There are skylights in the bathrooms, kitchens, and master bedroom closet (it has no windows.) The photo right was taken from the master bedroom, looking down through the closet and bathroom. The second, larger skylight will be over the shower and tub.
Working with the roof panels is a challenge (photo below), as they are pretty heavy and awkward. On a larger project T.B. would have brought in a crane, but it would have added a lot of cost. Since this is a relatively small, one-story home, we are using muscle power and leverage instead. Metal straps fastened to the panel faces give us something to grip, as the OSB can be slippery. When walking on the roof, we have to avoid stepping on nails, cords, or sawdust, as they could act as ball bearings and send us sliding down.
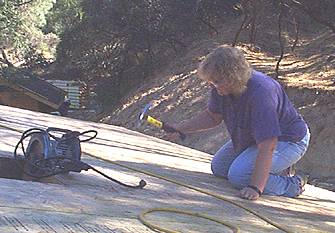
There are billions of nails to drive into the roof panels to hold them together, so I've kept busy the past few mornings. I bought a new hammer last week. 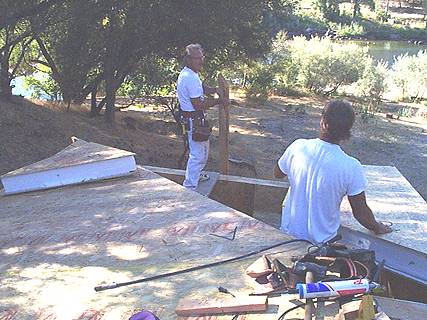 My old hammer is all metal, so the handle weighs as much as the head does, and it transmits a lot of shock through to my wrist. The new one has a lightweight graphite handle and a 20 oz. metal head. Besides putting all the weight in the head, the graphite acts as a shock absorber for my wrist. I'd probably be better off with an 18 oz. or even 16 oz. head, but this model didn't come in a lighter weight. And after hefting all the hammers at Home Depot, it was the clear winner in just plain feeling good. It makes driving the nails SO much easier and faster than with the old mallet.
 For the underside of the panels, T.B. will let me use the nail gun. The disadvantage of the nail gun is that it has a tendency to smash right through the OSB. T.B. will set it to its lowest compression, which should help but will mean that sometimes I have to finish the nail off with my hammer.
As before with the walls, adding the roof brings me closer to an understanding of how the house will look when it is done. I like it more and more every day.
-- Donna